Installing WordPress is easy to do but when installing it is very important to make a few key changes to maximise the security of your new WordPress website. First I recommend never using a one-click install script as they tend not to make the simple but necessary security changes during install to keep your website safe and secure. Lets get started.
First download the latest WordPress zip file from WordPress.org
First step is to download the latest version of WordPress and save it on your computer to upload via cPanel. Direct download link to latest version of WordPress.
Uploading the zipped file using cPanel
I’m quite particular in finding fast ways to install WordPress and the quickest way I’ve found is to upload the wordpress.zip file into the public_html/ folder on your server. Then use the cPanel file manager to unzip the WordPress files instead of unziping the file locally and using FTP to upload over 1500 files. Time saving can be over 10 minutes to upload WordPress even on a very fast connection.
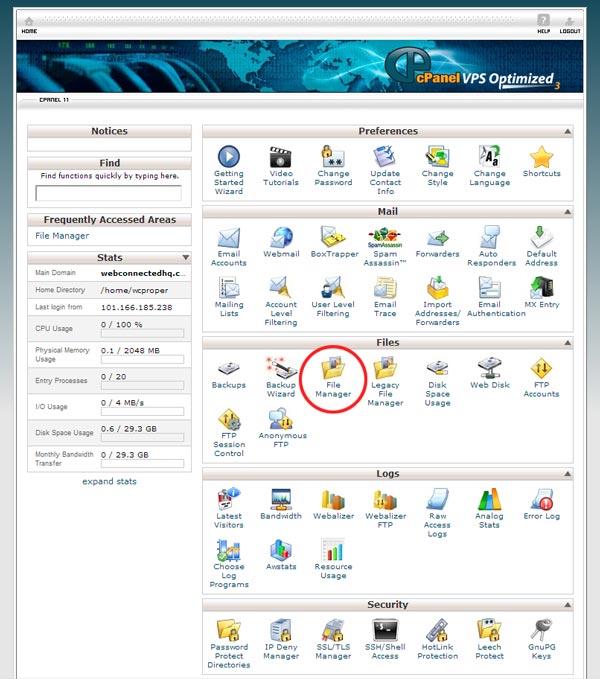
Login to cPanel usually by visiting http://YOUR_DOMAIN.com.au/cPanel. When you sign up for hosting they provide you your cPanel access address so use that if adding cPanel to your domain name doesn’t work.
Once in you will see the cPanel home page which has several options, just look for the file manager icon to bring up the file manager.
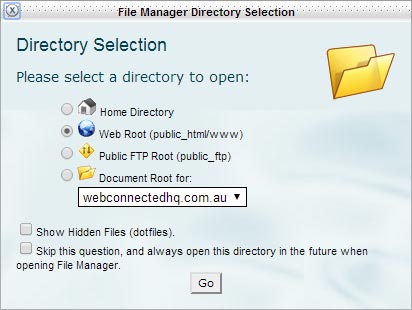
Select the Web Root (public_html/www) option to open the file manager to the public_html folder. This is where your website will be installed into. For this tutorial I’m assuming you want WordPress installed in the main folder so when the visitor access your website domain name your WordPress website will load. If you already have a website and want to add a blog you can create a folder inside the public_html like blog and install WordPress there.
Next select the Upload icon from the cPanel file manager to bring up the upload page.
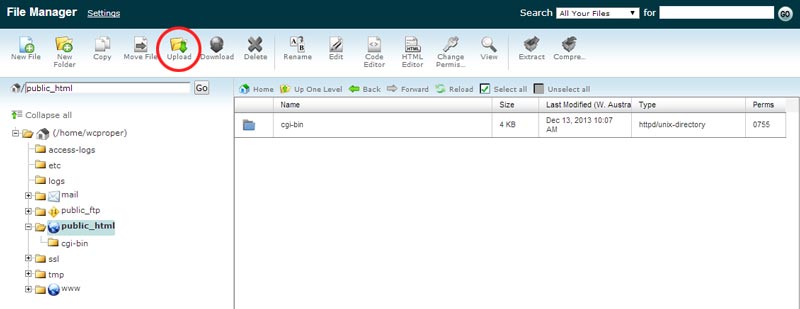
Press the Choose File button and browse on to the wordpress.zip file you saved earlier. Once the upload is complete close the Upload File page.

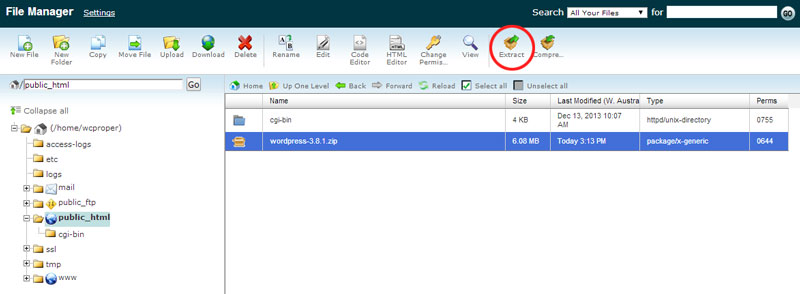
Next select the WordPress-3.8.1.zip file and press the Extract button to unzip the files. When the dialogue box pops up just leave the location as /public_html and press Extract File(s).
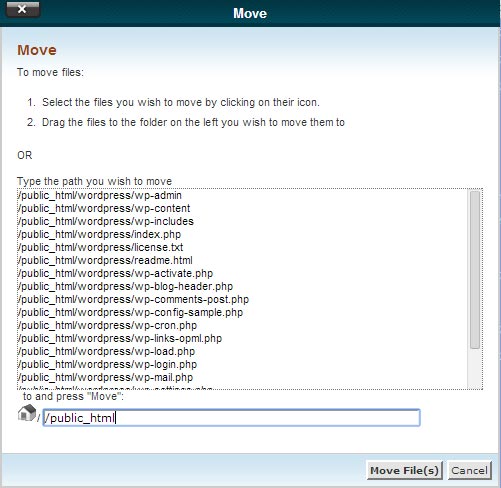
Once completed you should see a word press folder, double click to enter this folder and then select all the files with the Select all button and press the Move File button.
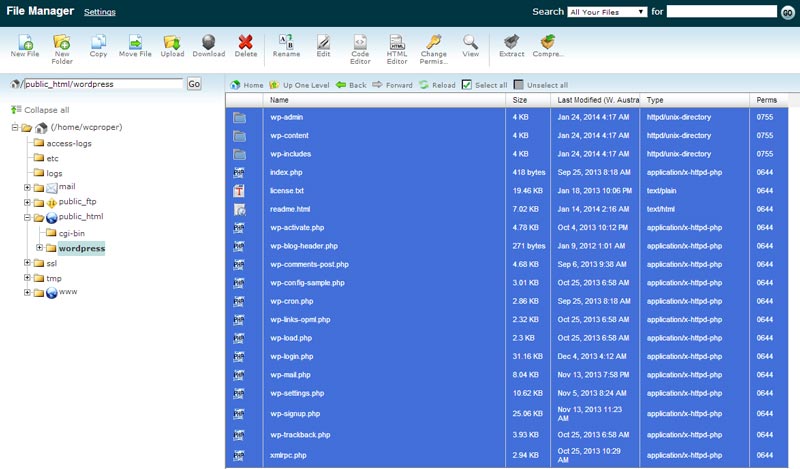
On the dialoge box that pops up make sure you change the folder from /public_html/wordpress to /public_html and press Move File(s) which will move the files back one level into the websites main folder.
The directory should now be empty so go ahead and press the Up One Level button to go into the main public_html directory. Next select the blue WordPress folder and Ctrl-click the wordpress-3.8.1.zip file and press the delete button to remove the files. Before we edit the wp-config-sample.php file we need to create the MySQL database and user. The MySQL database is where WordPress stores all its settings, website content and links to images that are uploaded.
Create the MySQL database and user from the main cPanel home page
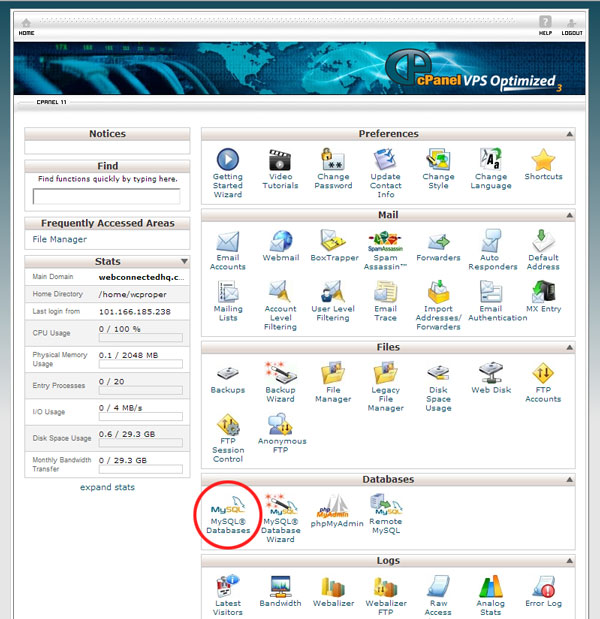
Go back to the main cPanel login page and look for the option under Databases called MySQL Databases and click it to bring up the page.
First we need to create a database then a user and most importantly assign the user to the database. Give your database a name and save it in a text file as you will need to enter it into the wp-config.php file shortly. I like to use the full website domain name. But remember the database name includes the prefix of your hosting account in this case the prefix is wcproper_. So save your database name in a text file which you will use shortly, in this case it is:
wcproper_webconnectedproperty
Press Create Database and the page should say Added the Database “wcproper_webconnectedproperty”. Press the Go Back Button.
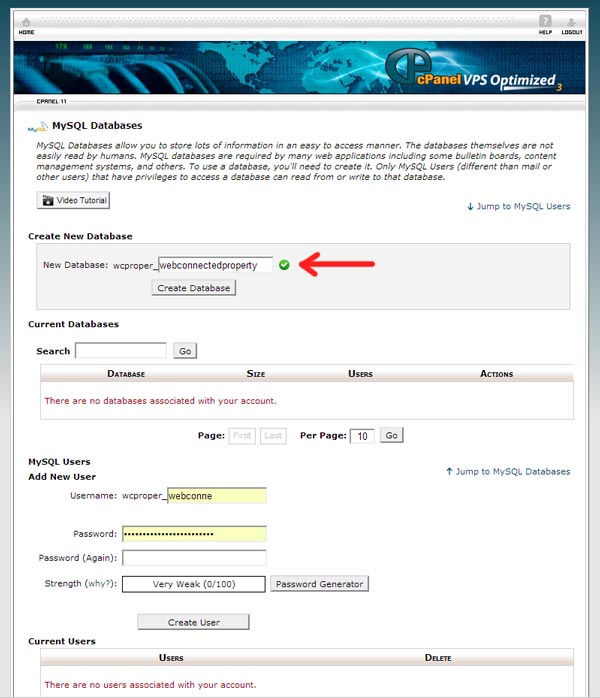
Next under the MySQL Users create a user name and it too has a prefix and is usually limited to a maximum of 7 characters. Also for maximum security use the password generator and set it to 18 characters for more security and save that it in your text file and press Create User.
My Saved Options:
MySQL Database Name: wcproper_webconnectedproperty
MySQL Username: wcproper_webconn
MySQL Password: kzQP[!pGH6$2Vxk3qB
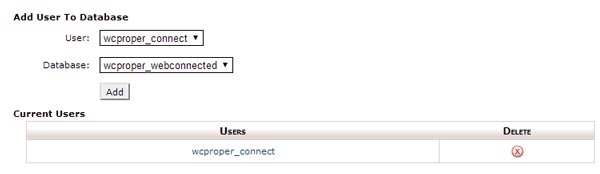
The last step is select the user and database and press the Add button to give it full access otherwise WordPress will not install.
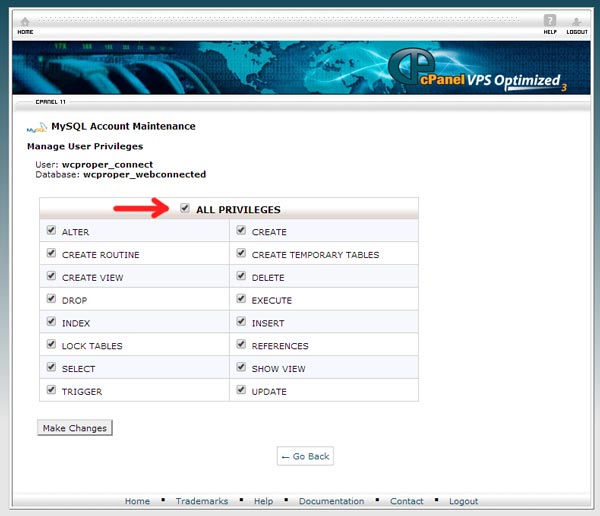
Press the All Privileges tick box which will give that user you created full access to this database. Make sure you press Make Changes button to save the changes. Next head back to the cPanel Home and open up the File Manager again.
Editing the wp-config-sample.php file and making minor security changes to help prevent your WordPress site from getting hacked
Open up the file manager again to with the Web Root public_html option like you did when uploading the zip file. Once there select the wp-config-sample.php and press the Rename button and remove the -sample from the name so it should now just be wp-config.php.
Next we need to add the MySQL database name, user and password to the wp-config.php file. So you are going to have to do a bit of simple coding. Not to worry it is really easy.
Select the wp-config.php file and press the Code Editor button and on the dialogue that pops up just press Edit.
You will need to edit the file and replacing these three words with the information you saved in the text file before but make sure you leave the single quotes in ‘ . so:
define(‘DB_NAME’, ‘database_name_here’);
BECOMES (‘with your database name’)
define(‘DB_NAME’, ‘wcproper_webconnectedproperty’);
And repeat for the other two username_here and password_here with your saved settings.
Next the two important security changes that can increase your WordPress website security. First is to set the Authentication Unique Keys and Salts by going to https://api.wordpress.org/secret-key/1.1/salt/. Select all the information that appears in your browser

Once you have copied the salt keys replace the lines in the wp-config.php file. The last and most often overlooked simple security tweak is to change the WordPress table prefix from the default ‘wp_’ to something unique. If you use the default setting clever hackers can possibly get into your website. I like to use my own key here but make sure it is limited to 4-5 characters max. eg wcwp_
Default setting
$table_prefix = ‘wp_’;
New More Secure Table Prefix Setting
$table_prefix = ‘wcwp_’;
Okay we are almost done so press Save Changes at the top of the editor.
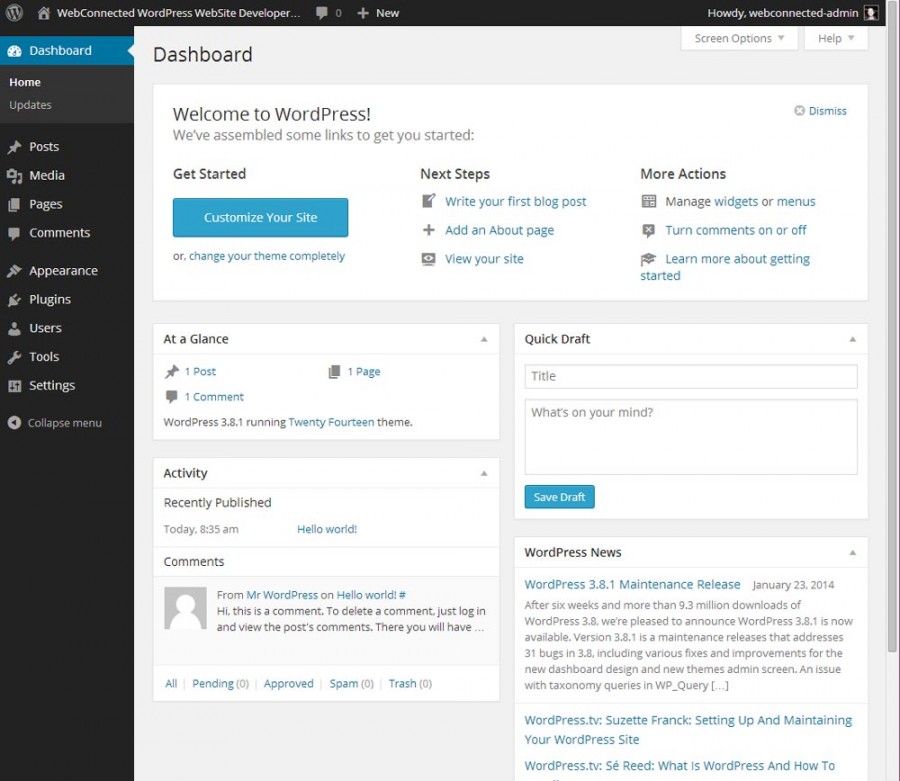
Running the WordPress install for the first time and creating the admin user.
Next open your browser and goto your domain location and if all is well you should be greeted with the Install WordPress page.
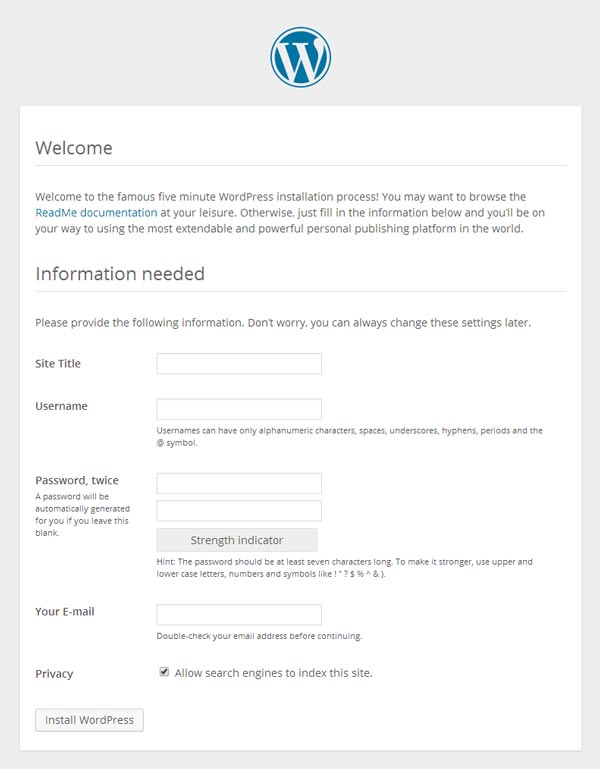
Give your website a site title and a unique username NOT admin as this is the default setting and if a hacker knows this then they can hack your website easier. Use a stronger setting like mydomainname-admin as the administrator account. Also a very long 24 character scrambled password is much better than ‘password1’ as I have seen so many people use. I am an avid user of 1Password for generating harder to hack passwords and saving them for me.
Most of my passwords are long like this: KTRQVnJeYNDqYr3eKF8BjaKn
Once you have pressed the Install WordPress you can login by adding /wp-admin or /admin to your domain name to access the log-in page.
Welcome to WordPress and I hope you enjoyed the tutorial on how to install WordPress on a cPanel server. Let me know in the comments below if you had any trouble installing WordPress and I’d be happy to help.