Once you have a portal provider in place and you’ve uploaded your listings and photographs into it you’re ready to configure the FeedSync for your website.
Step 1: Decide where the final hosting server will be
Its much easier to to this once on the final server then to change things later. You have enough to do when launching a new website that you don’t want to add another step in the way and have to wait for your provider to adjust their settings on your tight schedule.
For example: You are developing a new WordPress web site on your local development server which will eventually replace an existing one but the client plans on keeping their current hosting.
Perform the following steps on the intended live server.
Step 2: Install FeedSync and setup, but don’t activate the cron job yet
Perform the installation of FeedSync and process a test REAXML file. Once you are happy with the test run delete the three XML files in the output directory.
Step 3: Create a unique FTP account for your REAXML provider
This lets you move FeedSync later and all you have to do is edit the providers FTP Account Directory on your hosting.
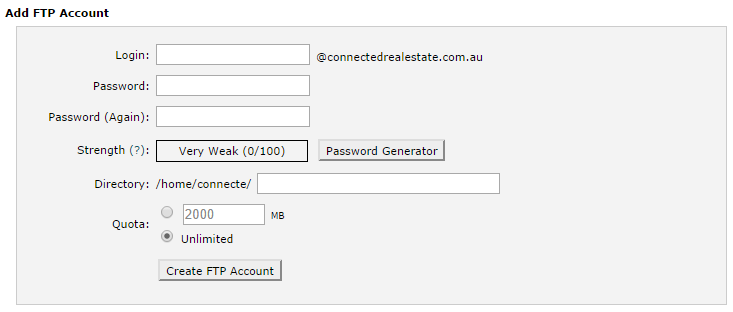
Log into your cPanel or your hosting account and press the FTP Accounts button. In the Add FTP Account box create a unique username and use a really long secure password.
Very Important: In the Directory field specify the FeedSync input folder. With cPanel its usually
public_html/XML/feedsync/input
DO NOT give your provider access to your hosting, cPanel or main FTP account… unless you want to watch your website and content vanish because you gave them access to everything.
Step 4: Supply your REAXML provider with the FTP account details that you created for them
Fill in their forms and enter in the details of the new FTP account.
FTP Account: ftp.myawesomewebsite.com.au
Username: reaxml@myawesomewebsite.com.au
Password: Really long secure password rn7vHgU3mURXYVyxwLYCyYAkH
Folder: Leave blank as you have only given them access to the input folder.
Step 5: Check to see if FeedSync has any REAXML files ready for processing
Launch FeedSync from your browser and when files are detected and ready for processing they will be listed on the FeedSync home page. Check FeedSync each day or until there are files waiting to be processed. This is why you didn’t configure the automated cron processing in step 2.
Before you get excited and process your waiting REAXML files, open the first xml file and check if the provider has included the latitude and longitude with the listings.
MyDesktop has recently included Google latitude and longitude coordinates in their XML files. No need to geo-locate the listings twice so you can leave the geocodes setting off in the FeedSync settings file.
If you are happy with everything, press the blue Process Feed button.
Now you can configure the server cron job to automatically run FeedSync every 12 minutes.
More REAXML import and FeedSync tutorials